Changing Lara's Outfit Tutorial
This tutorial ia a
quick and easy guide to changing Lara's outfit with strpix3.
Open
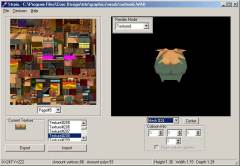
strpix3 by clicking on strpix3.exe. A window will appear with two main
sections. (fig.1). At the top left choose File > Open and browse to the
folder...
C:/programfiles/core design/trle/graphics/wads
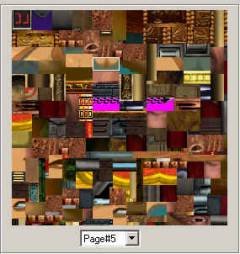
Here you
will see:
tut1.wad, settomb.wad, clepal.wad, karnak.wad, coastal.wad,
city.wad and title.wad. You may have also downloaded other wads such as
library.wad and guard.wad.(fig.2)
Part 1
For this tutorial we will use settomb.wad. If at a later point you want to revert to the original wad, make a backup copy of settomb.wad and place it somewhere safe.
Open settomb.wad and you will see the textures appear on the left. They become smaller as you go down and it is harder to tell which textures belong to which object. This is not a problem with strpix3. On the right you will see an object mesh. This is one of Lara's thighs.
To add the textures to the mesh, look where it says "render mode". On the pull down menu, select "textured". We'll start with her top. To find the mesh of this part of Lara, look below the image where it says "mesh#0". Click on the arrow next to it to show the meshes. Click off this and press the down button on the key board.
"mesh#1" is the other thigh, then her pistol and so on. Keep going down to "mesh#24", which should be her top.
HOLD the RIGHT mouse button on her top, and whilst holding, move the mouse to the left,right,up,down, any way you want and her top will rotate.This can be done with all meshes.
So now we will change her top colour to blue, just to keep it simple and get the hang of it.
Part 2
There are two main methods:
1. quick easier method, perhaps less detailed
2. Longer, but very detailed method
The following will take you through both:
Hold CTRL and click on her front, the cleavage area. The texture file on the left will automatically select this texture, which is surrounded by a white rectangle. To change this texture click on export at the bottom left.
1. Give it the filename "front.bmp" and save in the wads folder. (You can save it wherever you like but to keep it easy we will save here).
2. Open your favourite paint program (eg. paint shop pro, photo-paint, etc.)
3. Find the folder with the front.bmp in it and open it.
Paint over the green sections in blue, you can add different shades if you like to make it more detailed. Once this has been completed, save the file over the one you loaded.
Go back to the strpix3 window and click on import (to the right of export). Load front.bmp and now the parts of that area that were green are now blue! You can do this for every texture to ensure maximum detail, but the easiest thing to do is the following method:
Part 3
1. Hold CTRL and click on a part of her top that is completely green.
2. Export as before and change to blue in the paint program.
3. Import back to alter that section.
4. Now, simply left click on all the parts of her top that are completely green, they will turn blue, this can be done for most of it but be careful not to click on the same textures with a piece of skin or something else. You will have to alter these the slower way.
Once this has been done, click File > save. Click back on where it says "mesh#24" and click off. Press the down button and alter the green parts on:
mesh#33
#36
#39
If you then save this and using the level converter convert settomb.TOM, you will now see her top is blue! This same method is used for all the objects and the rest of Lara. Have fun!